01993 810 210

Arnhem - John Frost Bridge (Image Copyright: Stephen Berridge)
When the Oxf and Bucks went “A Bridge Too Far” – 20th September 1944
Arnhem - John Frost Bridge (Image Copyright: Stephen Berridge)

John Frost Bridge, Arnhem (Image ©Stephen Berridge)

On this day 20th September 1944

1ST AIRBORNE DIVISION – ARNHEM

Reinforced by around 1000 men of the 1st and 4th Parachute Brigades, the 2nd South Staffords and the 7th King's Own Scottish Borderers, the horseshoe-shaped position (perimeter) is formed by the divisional troops, around 3600 men, little more than thirty percent of the troops which have landed. The force at the bridge had to give up and the Germans could again freely move to the south.

“Out of ammunition, God save the King”

Last radio message from the Bridge at Arnhem.

Map from “Victory in the West” Volume 2 The Defeat of Germany by Major L .F. Ellis and James Butler 1962

Map from “Victory in the West” Volume 2 The Defeat of Germany by Major L .F. Ellis and James Butler 1962


Captain MOY-THOMAS

Captain MOY-THOMAS

Captain Moy-Thomas' Grave

Men of the Campaign:

Captain Edward Alfred MOY-THOMAS - 1st Airlanding Brigade Headquarters, Staff Captain.

Commissioned into The Oxfordshire and Buckinghamshire Light Infantry on September 7th 1940 he served with the 52nd until he was posted to the Headquarters of 1st Airlanding Brigade as Liaison Officer and served in the airborne invasion of Sicily, then Italy. He was later promoted to Captain and appointed as Staff Captain with the HQ of 1st Airlanding Brigade in which position he held at Arnhem. He was killed in action on 20th September 1944 when Brigade HQ took a direct hit from a Mortar bomb which also killed another three staff officers including Captain Stuart Leslie Blatch of the Royal Signals, brother of Captain John Blatch of the Glider Pilot Regiment and formerly of the Buckinghamshire Battalion of the Regiment.


Lieutenant John “Jack” Hollington GRAYBURN

Lieutenant John “Jack” Hollington GRAYBURN VC

The Victoria Cross

Lt. GRAYBURN VC HEADSTONE

Lt. Grayburn VC's Grave

Men of the Campaign:

Lieutenant John (“Jack”) Hollington GRAYBURN - 2nd Parachute Battalion. Platoon Commander, Number 2 Platoon, A Company.

Commissioned into The Oxfordshire and Buckinghamshire Light Infantry on 14th September 1940 he served with the 1st Battalion (the 43rd). For the greater part of his service with the Battalion he was the Officer Commanding the Carrier Platoon and promoted T/Captain.

In June 1943 he transferred to the Parachute Regiment (with a reduction to his substantive rank of Lieutenant), serving with the 2nd Parachute Battalion in North Africa and Italy. At the time of the Arnhem Operation he was platoon Commander of 2 Platoon, “A” Company (Major Tatham Warter).

For his actions during the defence of the Bridge at Arnhem he was posthumously awarded the Victoria Cross.

The following details are given in the London Gazette of 23rd January, 1945:-
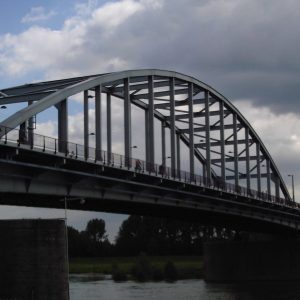
Lt. Grayburn was a platoon commander of the Parachute Battalion which was dropped on September 17th, 1944, with orders to seize and hold the bridge over the Rhine at Arnhem. He, with his platoon, was to capture the southern end. Lt. Grayburn was wounded in the shoulder almost immediately, but he directed and pressed the assault until casualties became so heavy that he was ordered to withdraw.

Later, he successfully organized the occupation of a house vital to the defence of the bridge. Although heavily attacked throughout the next day and night, thanks to Lt. Grayburn's courage, leadership, and skill in disposing his men, the house was held until it was set on fire on September 19th, and had to be evacuated.

Lt. Grayburn then formed a fighting force of elements of all arms, including the remainder of his company. Although wounded again, this time in the back, he refused to be evacuated. When tank attacks, against which he had no defence, finally forced his retreat on September 20th, he stood up in full view of the enemy, and directed the withdrawal of his men to the main defensive perimeter.

He was killed that night.

For nearly four days, despite pain and weakness from his wounds, shortage of food and lack of sleep, Lt. Grayburn displayed supreme and unflagging gallantry and determination. Without his inspiring leadership the Arnhem bridge could not have been held for so long."


This blog is part of a series which will be published each day from 17th to 26th September 2021, 77 years on from the day in which the events described happened.

Stephen Berridge has long been a volunteer at Soldiers of Oxfordshire Museum, and has an encyclopedic knowledge of all things Oxf & Bucks Light Infantry - his knowledge has helped us put together a number of our exhibits - most recently a new  Battles display featuring stories from Arnhem.


Enjoyed reading this article? Please consider supporting SOFO Museum with a donation:

Leave a Reply


Soldiers of Oxfordshire Museum
Park Street.
Woodstock
Oxfordshire OX20 1SN

Phone and Email:
General Enquiries & Event Tickets: 01993 810 211
frontofhouse@sofo.org.uk

Privacy Policy
Terms and conditions